Pink Hair Tutorial: Base, Placement, and Fade

Quick answer: Choose pastel, vivid, rose, coral-pink, or magenta depth from the real starting base. Strand-test the exact formula and map sections before applying color. This independent editorial guide does not claim first-hand testing, does not diagnose or prescribe, and does not promise a particular result.
Translate the reference into depth and undertone
Pastel blush, rose gold, hot pink, coral, and magenta use different pigment balance and starting levels. Identify the target depth, warmth, and placement instead of asking one dye to reproduce an edited image.

Match visibility to the starting base
Very pale bases show pastel and vivid pink most clearly, while medium or dark hair may show a deeper tint unless lightened. More lightening is not automatically appropriate when condition or scalp history raises risk.
Map roots, mids, ends, and accent sections
Decide whether the look is full color, underlayer, face frame, tips, or highlights before mixing. Porous ends and pre-lightened pieces may absorb pink faster or fade differently from roots.
Plan staining and future color
Pink can transfer and may fade toward peach, red, magenta, or a residual stain. Protect surfaces, avoid fixed wash counts, and consider how remaining pigment affects the next intended shade.
Define pastel, rose, coral, vivid, or magenta
Pastel pink is light and low in pigment depth; rose is muted or slightly brown; coral leans orange; vivid pink is saturated; magenta leans violet. Name the target before selecting a formula. A filtered photograph can hide warmth, uneven lightening, and fading. Compare several references under neutral lighting and identify the acceptable range rather than demanding one exact screen color.
Assess whether the base can display the target
Pastel usually needs a very light, even canvas, while vivid or deeper pink may remain visible on a darker or warmer base. Existing yellow can push the result toward coral, and blue or violet residue can cool it. Dark artificial dye, banding, and porous ends complicate prediction. Do not promise that one pink formula will cover or cancel every starting color.
Set a lightening boundary before mixing color
If the target requires a lighter base, assess hair condition, prior bleach, permanent color, relaxers, and overlapping sections first. The AAD advises spacing chemical services and handling processed hair gently. Repeated lightening to chase a pale reference can cause severe breakage. Use a qualified colorist when history is uncertain, bands are present, or the desired lift exceeds current skill.
Complete allergy and strand tests separately
Follow every label-required skin-allergy test exactly, even when the color is described as semi-permanent or conditioning. The FDA notes that hair dyes can cause serious reactions. A strand test answers different questions: visibility, undertone, processing, staining, and hair feel. Use representative root, mid-length, and end strands when those areas differ, and do not substitute one test for the other.
Create a section map before opening the dye
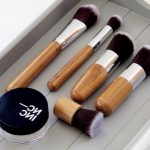
Draw or photograph the plan for full color, split dye, face frame, hidden panel, money piece, tips, gradient, or highlights. Decide section width, symmetry, root treatment, and where two colors meet. The hair-dye brush guide covers bristle and handle control. Clean sections reduce missed areas and unwanted overlap more effectively than rushing with extra product.
Prepare tools and stain protection
Use the bowl, brush, gloves, clips, timer, and protective materials permitted by the product instructions. Cover clothing and compatible surfaces, and keep clean towels available. Do not use metal tools when the label prohibits them. Keep hair color away from eyebrows and eyelashes, store it away from children, and never retain a mixed oxidative formula for later use.
Apply only according to the selected formula
Direct dye, oxidative permanent color, and tinted conditioner have different preparation, timing, and rinse directions. Follow the current package rather than combining instructions from tutorials. Saturate mapped sections methodically without grinding color into the scalp. Respect the stated processing limit. More time or heat does not guarantee stronger pink and may increase skin or hair risk.
Check balance before the final rinse
Use mirrors to inspect the nape, crown, part lines, and boundary between accent sections while staying within label timing. Do not add an unplanned second chemical step when one area appears different. Rinse and finish as directed, then assess after appropriate drying and lighting. Wet hair and bathroom light can make saturation and undertone look different from the final result.
Expect staining, transfer, and an individual fade path
Vivid pink can transfer to towels, clothing, pillows, skin, and porous bathroom surfaces. Protect materials until the actual formula stops transferring. Fade may become softer pink, coral, peach, lavender, or uneven residue depending on base and pigment blend. The permanent pink guide helps compare a different commitment level; neither category has a universal duration.
Maintain color without stacking unnecessary exposure
Choose cleansing frequency from scalp and hair needs, use heat and sun protection where appropriate, and follow the dye maker’s aftercare. A pigmented mask or conditioner can refresh tone but also shift color or build unevenly, so strand-test it. The red dye guide provides context when the target is warmer or deeper.
Correct slowly when the result differs
First identify whether the problem is depth, warmth, patchiness, root difference, or staining. Record the exact formula and timing. Do not immediately overlap bleach, remover, or another oxidative dye on compromised hair. Some mismatches can be reframed as a deeper pink or allowed to fade; severe banding, scalp injury, or breakage needs professional assessment rather than repeated home correction. Recheck the result in neutral light after the hair is fully dry before deciding that correction is necessary.
Pink color tutorial checklist
- The target pink family and acceptable range are named.
- The starting base and chemical history support the plan.
- Allergy and representative strand tests are complete.
- Placement, tools, stain protection, timing, and rinse are mapped.
- Fade, maintenance, and correction are planned before application.
Related Beauty Supply Reviews guides
Editorial sources
- https://www.fda.gov/cosmetics/cosmetic-products/hair-dyes
- https://www.aad.org/public/everyday-care/hair-scalp-care/hair/coloring-perming-tips